Sampling tips
In this section
Collecting algae scrape or pinch samples

Sampling algae.
If your objective is simply to find out about the main algae at your stream site (you might simply be interested in what the green or brown slime is, or perhaps you’re worried it might be sewage fungus) you only need to collect a small scrape or pinch of the algae to observe under a microscope. It’s a good idea to avoid skin contact with algae if you know little about the site or about the algae you’re collecting, so wear latex gloves or use a scraping utensil (or pair of tweezers) to scrape/pluck a sample from the streambed. A small plastic container like a film case, plastic vial/jar or small plastic bag is fine for transporting algae from the stream to the classroom or lab. If you’re analysing it the same day, no preservation is needed (algae are especially cool to look at when alive as many may be moving around). Don’t let the sample “cook” in the sun or in a hot car prior to analysing.
Extracting algae from an invertebrate sample
Most community groups doing stream biological monitoring are primarily collecting freshwater invertebrate samples. These samples are usually collected with a fine mesh net, and the raw sample contains all sorts of streambed material including algae. Most groups spread the sample material out in a shallow tray so they can find their invertebrates, and this is also ideal for finding tufts of algae. Small pinches of algae can be transferred with tweezers or a dropper to a separate container (any small dish or vial) ready for microscope analysis. Try to collect examples of all the “types” of algae you observe, e.g. filaments, mats or tufts, and look for different colours particularly green, blue-green, pink or brown – they might all be different groups of algae. No preservation is necessary if you’re looking at the algae sample under a microscope the same day.
Sampling algae from lakes, ponds, wetlands or puddles
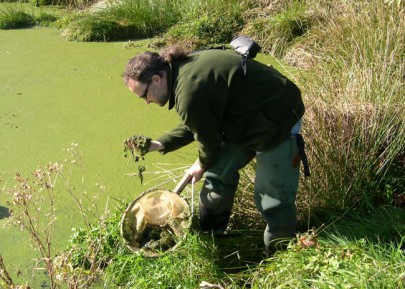
Nutrient-rich waters can contain many thousands of planktonic (floating/suspended) algae cells per ml of water. We find that a small vial of water taken from near the surface provides plenty of material for microscope analysis. Some algae will form scums on the surface of the water and identifying this may be your main objective, in which case you only need to scoop a small sample from the surface. Note that some surface scums that form on nutrient-rich waters might be toxic, so use latex gloves, or collect your sample in a way that avoids skin contact. In lakes or wetlands that have lower nutrient levels (or they may be well flushed) there may only be low numbers of algae cells per ml, and in these cases you might need to collect a larger jar/bottle of water and let it settle in the lab for a few hours. Most algae will eventually settle to the bottom and you can extract a few drops from the bottom (with a pipette or dropper) for microscope analysis. Again it’s best to analyse the live algae under a microscope the same day so you can see the way some algae move/swim, and you’ll see the natural colours of live specimens.
Analysing algae under a microscope
The sorts of compound microscopes commonly used in NZ high schools are likely to be sufficient for the identification of many algae groups. These microscopes shine a light through a sample sandwiched between a glass slide and a coverslip, usually with magnification options of 40X, 100X and often greater. You only need a small amount of sample material on your glass slide for microscope analysis – two or three drops of algae-rich water from a lake/pond/puddle, or a few tiny pinches of filamentous/tuft algae from your stream sample are all you need. If you’re transferring small bits of filaments, tufts or mats to the slide, try to tease them out as much as possible – you want the light to shine through the cells and this can’t happen if you have thick wads of matter on the slide. The other advantage of spreading the sample out is that this helps to flatten the sample, which keeps more of the sample in focus at any one time. Keeping the sample wet is important, so ensure there is always water on the slide – many algae shrivel up quickly if they dry out. Remember you can quickly set up another slide and look at more material if you didn’t get it right the first time!
Once you’ve got a good microscope view of your algae sample, try using the identification keys in this web resource to identify the algal types (“taxa”). The information provided on each algal taxon may help you to learn about whether your algae are “normal” for the habitat, whether they may be toxic, whether they might indicate something about water quality etc.
